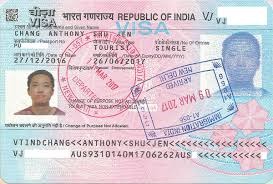
Understanding Visa Types for India
Before applying, it’s essential to know which type of visa you’ll need. India offers different visas based on the purpose of your visit, including:
- Tourist Visa: For leisure, sightseeing, or family visits.
- Business Visa: For business-related activities such as meetings, conferences, or trade.
- Medical Visa: For those seeking medical treatment in India.
- Student Visa: For students admitted to educational institutions in India.
- Employment Visa: For professionals hired by Indian companies.
Understanding the correct visa type is important, as applying for the wrong one can lead to delays or application rejections.
Step-by-Step Guide on How to Apply for an Indian Visa Online
Here is a step-by-step breakdown of how to apply for an Indian visa online.
Step 1: Visit the Official Indian Visa Website
Start by visiting the official Indian government website dedicated to visa applications. You can search for “Indian visa online application” to find the correct website. Be cautious of third-party sites that may charge extra fees or fail to submit your application correctly. The official website is the safest and most direct way to apply.
Step 2: Choose the Type of Visa and Select Your Application Form
Once on the website, you’ll need to select the type of visa that aligns with your purpose of travel. You will be directed to a specific form depending on your choice. For instance, if you’re applying for a tourist visa, select the ‘Tourist Visa’ category. Make sure to double-check this selection before moving on, as it can impact the entire application process.
Step 3: Fill Out the Online Application Form
The online application form will require detailed information about you and your travel plans. Here’s a breakdown of the information typically needed:
- Personal Information: Full name, date of birth, nationality, and gender.
- Passport Information: Passport number, date of issue, expiration date, and place of issue.
- Travel Details: Expected arrival date, duration of stay, and any cities you plan to visit.
- Background Information: Information about your employment, family, and any criminal history, if applicable.
Take your time filling out this section, as errors or omissions can lead to delays. It’s always a good idea to double-check your entries before moving to the next step.
Step 4: Upload Required Documents
The online Indian visa application requires you to upload certain documents. These typically include:
- A Scanned Copy of Your Passport: The passport must be valid for at least six months from the date of your planned arrival in India.
- Passport-Sized Photo: A recent, clear photograph in a specific format is required. Generally, it should be in color, with a plain background, and meet certain size specifications. Ensure that your photo adheres to the stated guidelines on the application portal.
Make sure the documents you upload are clear and legible. Fuzzy or unclear images can result in your application being rejected.
Step 5: Pay the Visa Fee
Once your application form is complete and documents are uploaded, you’ll need to pay the visa fee. Payment can be made online using a credit or debit card, or through other accepted online payment options. Visa fees vary depending on the type of visa and the applicant’s nationality. Make sure to save a copy of your payment confirmation for reference.
Step 6: Submit the Application and Wait for Processing
After payment, you can submit the application. You’ll receive a confirmation email with an application ID, which you should keep for tracking purposes. Processing times vary, but it usually takes a few days to receive an update. You can check the status of your application on the official visa website using your application ID.
Step 7: Receive Your e-Visa or Schedule an Appointment
Once approved, you will receive an electronic visa (e-Visa) via email. Print a copy of this document and keep it with you when you travel. For some visa types, you may need to schedule an appointment at the Indian embassy or consulate for a final interview or biometric submission. Follow any specific instructions provided in your approval email. INDIAN VISA FOR AMERICAN CITIZENS
Important Tips for Applying for an Indian Visa Online
Double-Check Your Passport Validity
Ensure that your passport is valid for at least six months beyond your planned date of arrival. An expired or soon-to-expire passport can lead to complications or rejections.
Use a Reliable Internet Connection
Since the application is entirely online, use a stable and secure internet connection to avoid disruptions during the process. A stable connection ensures that your information is accurately submitted and prevents errors or incomplete submissions.
Keep Your Application ID Safe
The application ID is crucial for tracking the status of your application and accessing your information later. Keep this ID in a secure location.
Be Prepared for Additional Information
Some applicants may be asked for additional information or an interview at an Indian embassy or consulate, depending on their visa type or nationality.
How Long Does the Indian Visa Process Take?
The processing time for an Indian visa can vary depending on the type of visa, your nationality, and current application volume. Generally, the online process takes anywhere from three to seven business days. However, it’s advisable to apply at least two weeks in advance of your intended travel date to allow extra time for any unexpected delays.
Conclusion
Applying for an Indian visa online is a straightforward process that makes traveling to India more accessible for travelers worldwide. By following this step-by-step guide, you can navigate the application process with ease, from selecting the correct visa type to completing the online form, uploading documents, and receiving your e-Visa. Remember to double-check all information before submitting, keep track of your application ID, and plan your application timeline to avoid last-minute stress. Now that you know how to apply for an Indian visa online, you’re one step closer to exploring the wonders of India!


